You’re rocking stone tools, maybe iron if you’re lucky, and now you want the good stuff. The sparkle. The flex. The reason half of Minecraft’s economy exists.
Diamonds.
They’re not just shiny. They’re essential for top-tier gear, enchanting tables, and bragging rights. So let’s talk about how to find them — efficiently, safely, and hopefully with minimal screaming.
Where diamonds spawn (and where they really don’t)
As of Minecraft 1.18 and beyond, diamond generation changed. Forget the old Y-level memes.
Key facts:
- Best level to mine diamonds: Y -58 (deep underground)
- Diamond ore spawns between Y 16 and Y -64
- The deeper, the better — more diamonds, less junk
- You’ll find them most frequently near bedrock
If you’re seeing stone and not deep slate, you’re too high.
Step 1: Gear up before you dig down
This is not a “wing it” mission. Diamond hunting can be deadly.
Must-haves:
- Iron pickaxe (you can’t mine diamond with stone)
- Torches (a lot of them)
- Food (bread, steak, whatever)
- Bucket of water (for lava emergencies)
- Extra tools (digging burns through picks fast)
- Blocks (for bridging over caves and lava)
Optional but smart:
- Shield (skeletons love to camp in caves)
- Armor (preferably iron)
Step 2: Get underground, the smart way
You’ve got two choices:
Cave diving (risky)
Find a giant cave, head deep, and look for exposed diamond ore in the walls and floors.
Pros:
- Fast
- Exciting
- Good for XP and other ores too
Cons:
- Lava lakes
- Mob swarms
- Death around every corner
Strip mining (boring but effective)
Dig down to Y -58 and create long horizontal tunnels spaced 2 blocks apart.
Pros:
- Safe
- Efficient
- Easy to expand
Cons:
- Feels like a desk job
- Can take time without Fortune
Pro tip: use the branch mining method. Main hallway, with side branches every 2 blocks. Efficient and keeps you sane.
Step 3: Mine smart, not hard
- Use an iron or diamond pickaxe (stone doesn’t work!)
- Bring Fortune III when you can — increases diamond drops
- Silk Touch is fine, but not necessary unless you want to store the ore itself
- Always carry a water bucket — lava at Y -58 is basically a roommate
Step 4: What to do when you finally find diamonds
First: pause and bask in the glow.
Then:
- Clear surrounding blocks (check for lava!)
- Place torches nearby
- Mine only with iron or better
- If you have Fortune, wait until you can use it
You’ll get:
- Diamond items (1–4 per block with Fortune III)
- Or, if using Silk Touch, a diamond ore block
Bonus tip:
Use diamond tools for… well, everything. They’re more durable, faster, and essential for late-game crafting.
Step 5: Now what? Enchant, craft, flex
Your first diamond priorities:
- Pickaxe – for obsidian mining (needed for Nether and enchanting)
- Enchanting table – requires 2 diamonds + book + obsidian
- Armor – when you have enough
- Diamond sword – optional, but sharp
Once you’ve got gear, enchant it. Then start thinking about netherite.
Dig deep, live carefully
Diamond hunting is equal parts logic, prep, and blind luck. You might find ten in an hour, or zero in four. That’s Minecraft.
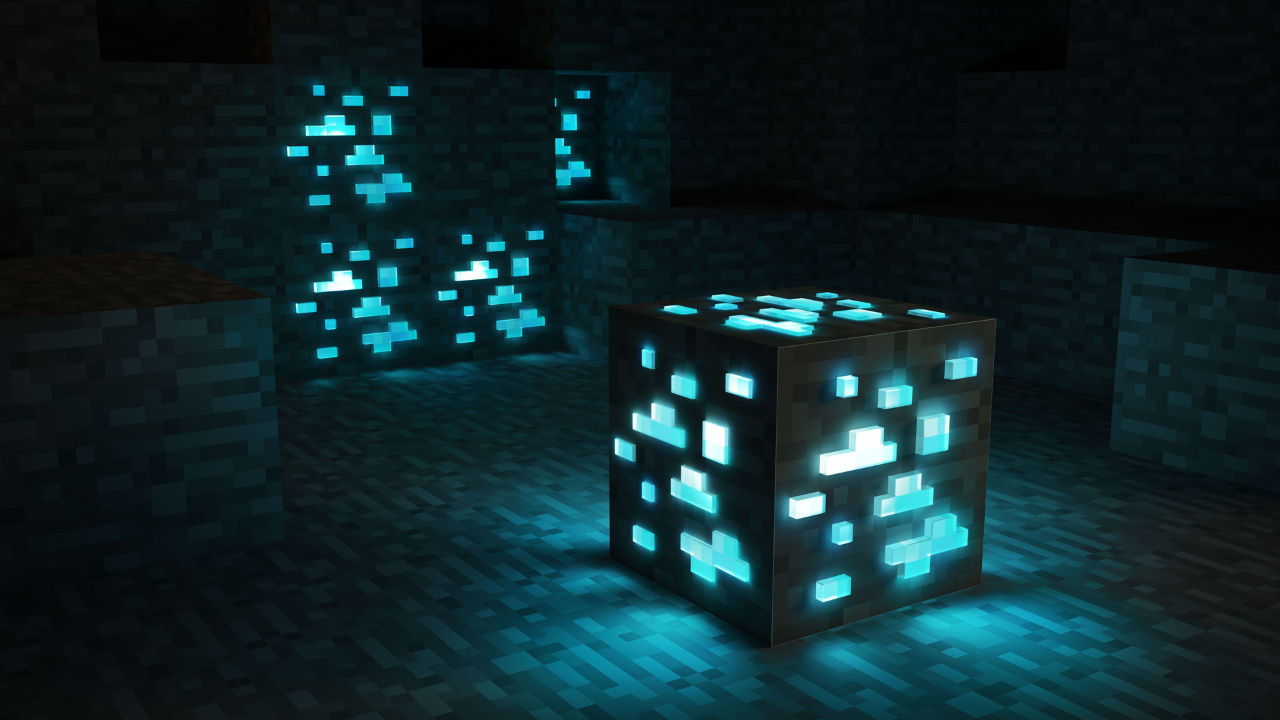
But when you finally see those teal-blue sparkles in the deep slate… yeah, it’s worth it.
Need a server where you and your friends can race to find diamonds, flex enchanted armor, or just scream when you fall into lava? LumaBlast servers are ready when you are.