So you’ve survived a few nights, stopped eating raw meat, and now you’re ready to settle down and live off the land. Welcome to farming — Minecraft’s most peaceful (and occasionally chaotic) pastime.
Let’s dig in. Literally.
Why farming matters (besides looking cozy)
Farming isn’t just for aesthetic builds and YouTube time-lapses. It actually matters:
- Keeps you from starving
- Provides trading materials for villagers
- Feeds animals (for even more food)
- Powers XP farms (indirectly)
- Looks great next to your tiny starter house
It’s also a break from fighting mobs and getting lost in caves. Therapy, but in block form.
Step 1: Get the essentials
You’ll need just a few things to start farming:
- Seeds – break tall grass to get wheat seeds
- Hoe – craft one with 2 sticks + 2 wood/stone/iron
- Water – grab a bucket (3 iron) or build near a river
- Light – crops need light to grow, even at night
Don’t overthink it. Dig some soil next to water, right-click with the hoe, plant the seeds. You’re officially a farmer now.
Step 2: Learn your crops
Here’s a cheat sheet for basic crops:
Wheat
- Grows from seeds
- Use to breed cows and sheep, or make bread
- Takes a while to grow, but reliable
Carrots & Potatoes
- Found in villages
- Replant the actual crop — no seeds needed
- Great for mass farming
Beetroots
- Also from villages
- Not very useful, honestly. But hey, red soup.
Pumpkins & Melons
- Grow sideways from a stalk
- Harvest with an axe
- Look great in builds, useful in potions and pie
Sugarcane
- Grows next to water
- Great for paper, books, and trading
- Stacks vertically like a weird green ladder
Cactus, bamboo, kelp — for later. Fun, but situational.
Step 3: Automate (a little)
Want to feel like a genius? Add these touches:
- Fence your farm – keeps animals from trampling crops
- Use water flow – place water streams to auto-harvest
- Use a composter – turns excess crops into bone meal (fast-grow fertilizer)
- Add trapdoors or slabs – stylish ways to keep water from getting everywhere
You can go full redstone later, but even these simple tricks will level up your farm game.
Step 4: Animal farming (adorably brutal)
You’ll want meat, leather, wool, and maybe some passive-aggressive mooing in the background.
Start with:
- Cows – leather + beef. Feed wheat.
- Sheep – wool for beds and builds. Feed wheat.
- Chickens – feathers + eggs + noise. Feed seeds.
- Pigs – mostly for pork. Feed carrots.
Build pens. Lure them with food. Close the gate. You’re a rancher now.
Pro tip:
Use a lead (crafted from string + slimeball) if you’re tired of animals wandering off like they don’t owe you rent.
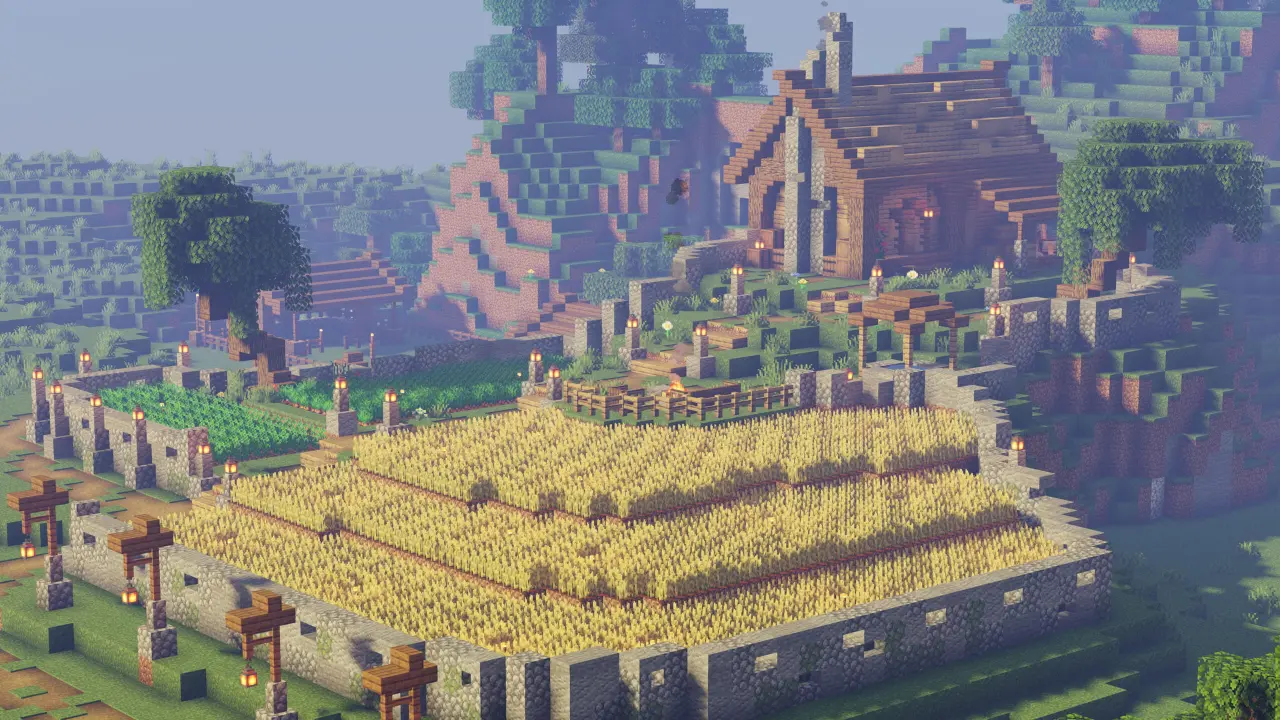
Step 5: Expand and upgrade
Once you’ve got the basics, start thinking bigger:
- Tiered farms (slopes and levels)
- Underground greenhouses
- Automatic redstone-powered harvesters
- Villager-based trading halls with crop trades
Eventually, your cozy little wheat patch becomes a sprawling agri-empire. And yes, you will be irrationally proud.
It’s all about peaceful progress
Farming in Minecraft isn’t just about survival, it’s about slowing down. It’s the hum of crops growing, the cluck of chickens in the morning, and the satisfaction of a field that didn’t exist yesterday.
So till the soil, plant the seeds, and enjoy the calm between the creepers.
And hey — want to build a shared farm with friends? LumaBlast servers are perfect for that. No griefing. Just peaceful farming vibes (and maybe a llama or two).